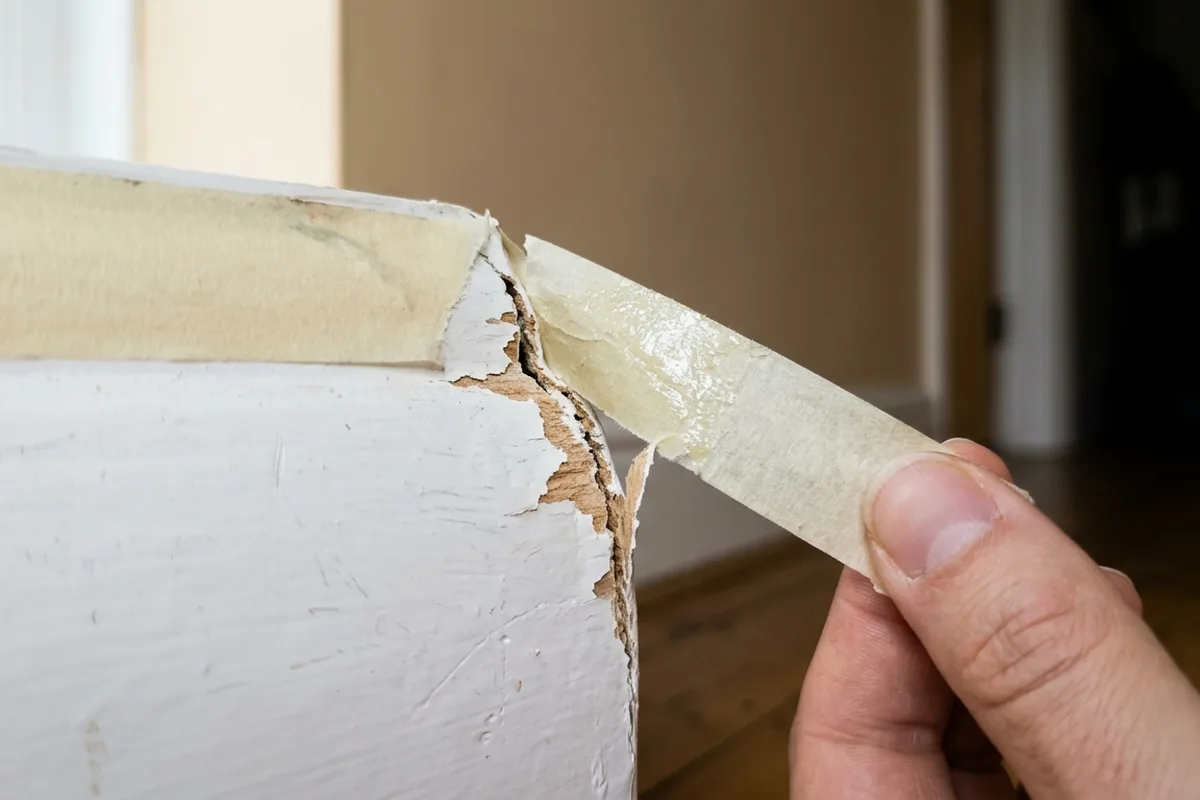
That slightly furry paint line along a door frame or skirting board is usually the first sign something has gone wrong with the masking tape. The simple reason is this: cheap masking tape often bonds too hard, lets paint creep underneath and then tears the paint film when you finally pull it off, especially if you’ve left it on for days. Good edges come from the right tape, applied properly and removed at the right time, not just from being “careful”.
What actually goes wrong when cheap tape stays on
When you leave low‑quality masking tape on a wall, door or window frame, a few things tend to happen at the same time.
First, the adhesive dries out and hardens. Instead of peeling off cleanly, it sticks like old label glue. When you pull, it can:
- lift the fresh paint you’ve just put on
- rip off the older paint underneath
- leave a jagged, chipped edge instead of a sharp line
Second, cheap tapes don’t seal tightly to the surface. As the paint starts to dry, paint can creep under the edge, especially with thinner paints on smooth surfaces like glossed skirting boards or a satinwood door. You only notice once you remove the tape and see a wobbly, feathered edge instead of a crisp line.
Third, if the tape is left on until the paint is fully hard, the paint film can bridge slightly over the tape edge. When you pull the tape away, that brittle paint ridge snaps and tears, dragging the edge with it.
Humidity from British weather and steam from a small bathroom can make all of this worse. Damp air softens paper tape and helps the glue soak into the paint surface, so it grabs even harder.
How to avoid ruined paint edges in normal home decorating
You do not need expensive decorator’s gear to get a clean line in a terraced house hallway or a rented flat bedroom, but you do need to treat tape like a temporary tool, not something you leave on all week.
The safest habits are:
- Choose the right tape
Look for decorator’s masking tape or “low tack” tape rather than the cheapest roll in the bargain bin. Blue or purple painter’s tapes are often designed to come off cleanly after a set number of days, which is helpful if you know you’ll be stopping and starting.
- Apply to clean, dry surfaces
Dusty skirting boards, greasy kitchen walls or flaking old paint stop the tape sealing properly. Wipe down with a slightly damp microfibre cloth, let it dry, then apply. Press the edge down firmly with a fingernail or a plastic card to get a good seal.
- Paint and remove in the right window
Most household paints in the UK (emulsion on walls, water‑based trim paints) like the tape removed while the paint is still slightly soft, usually within 1–4 hours. Check the tin for “touch dry” time. As a rule, remove tape once the paint is touch‑dry but before it has fully hardened.
- Peel back on itself, slowly
Don’t yank the tape straight out from the wall. Pull it back on itself at about a 45° angle. If you hit resistance or see the paint stretching, stop and score the edge gently with a sharp knife before carrying on.
- Avoid baking tape in sunlight or steam
Tape around a sunny window board or over a shower screen edge will set harder and fail faster. If you’re painting a bathroom, get the coat on, ventilate the room, and take the tape off as soon as the paint allows.
If you know you cannot finish in one day, pick a tape that states how many days it can stay on and still remove cleanly, and still try not to push it to the limit.
If the tape is already stuck or the edges are ruined
Sometimes the damage is already done: the tape has been sitting on a glossed door frame for a week, or you’ve pulled it off and taken half the line with it. You can usually make it look respectable again with a bit of care.
If the tape is still on
If the tape is clearly baked on and tearing:
1. Soften the bond a little
Warm the tape gently with a hairdryer on a low setting, moving it back and forth. This can soften some adhesives enough to peel more cleanly. Do not overheat; you just want it warm to the touch.
2. Score before peeling
Run a sharp craft knife or Stanley blade very lightly along the paint/tape edge. You’re cutting the paint film, not digging into the plaster. Then peel the tape back on itself slowly.
3. Clean any residue
If glue is left behind, try a damp cloth with a drop of washing‑up liquid first. For stubborn bits on gloss or satinwood, a small amount of white spirit on a cloth can help, but test in a hidden spot and avoid using it on fresh emulsion walls.
If the paint edge is already ragged
If you’ve peeled the tape and the line is chipped or furry:
- Lightly sand the damaged edge once the paint is properly dry (usually the next day). Use a fine sanding pad and go gently to knock back the ridge.
- Wipe the dust off with a dry microfibre cloth.
- Freehand “cut in” the line using a decent angled brush rather than re‑taping the same area. A steady hand is often kinder than putting more adhesive over weakened paint.
- If you must re‑tape, keep the tape just off the previous damage line, and use a better, low‑tack tape removed promptly.
If large sheets of old paint have come away down to bare plaster or wood, that is less about the tape being cheap and more about weak or poorly bonded previous paint. In that case, you may need to scrape the loose area back, spot‑prime, then repaint rather than blaming the tape alone.
A good rule of thumb: if you’re about to walk away from a freshly painted room in your semi or flat, take five extra minutes to pull the tape while the paint is still soft. That small habit prevents most of the shredded edges and touch‑ups later.