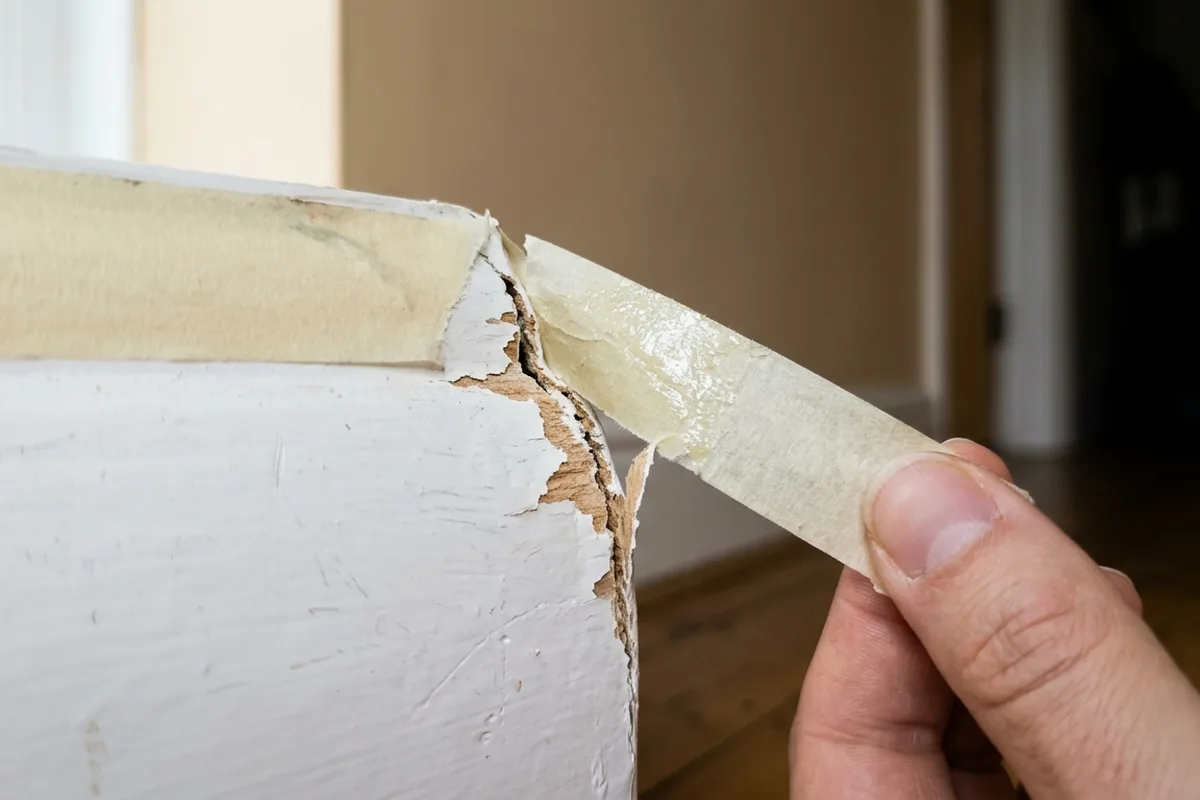
Hairline cracks across a wall in the hallway, a little split above a door frame, or a fine line where a chimney breast meets the ceiling: these are the sort of things you notice when the light hits just right. The good news is that you don’t need a plasterer for most small cracks, but you do need the right filler. In simple terms: use a ready-mixed lightweight or fine surface filler for tiny, shallow cracks, and a general-purpose or flexible decorator’s filler for slightly wider ones, especially around doors, windows and skirting boards where there’s movement.
Matching the filler to the crack you can see
The type, size and location of the crack are more important than the brand on the tub. A fine hairline across a painted living room wall is very different from a slightly gaping crack along the corner of a cold outside wall.
For very small, shallow cracks (you can barely get a fingernail in), a fine surface filler or lightweight ready-mixed filler is usually best. These are smooth, easy to sand and ideal when the wall is already painted and you just want it to disappear under emulsion.
For small but slightly wider cracks (up to about 3–4 mm), especially:
- between wall and skirting board
- around a door frame in a terraced house
- along the edge of a window board
a flexible decorator’s caulk/filler is often better. It copes with the slight movement you get from doors slamming, central heating cycling on and off, or an older house settling. Look for “flexible” or “for gaps and cracks” on the label.
If the crack is in bare plaster or deeper than it looks, a general-purpose powder filler that you mix with water can be more robust. It grips well and shrinks less on drying, which matters if you’re going to sand it flat and repaint a whole wall.
As a quick rule of thumb:
| Crack type | Best filler type | Why it helps |
|---|---|---|
| Fine hairline in painted wall | Fine surface or lightweight ready-mixed | Smooth, easy to sand, minimal shrinking |
| Small gap at skirting or architrave | Flexible decorator’s caulk | Moves with timber and temperature changes |
| Shallow crack in new plaster | General-purpose powder filler | Good bond, can be built up if needed |
| Crack at ceiling/wall joint | Flexible filler or caulk | Reduces re-cracking where movement is common |
If a crack is wider than 4–5 mm, keeps reopening, or runs in a clear pattern (for example, zig-zagging through bricks, or appearing above several doors), that’s beyond “small wall crack” territory. In that case, stop at cosmetic filling and get a builder or surveyor’s opinion.
When to choose flexible, lightweight or powder fillers
Once you’ve looked at the crack, the next choice is the filler’s behaviour: flexible vs rigid, lightweight vs dense, and ready-mixed vs powder.
Flexible fillers and decorator’s caulk are best:
- where two different materials meet (plaster and timber, plaster and uPVC window frame)
- along ceiling lines in a loft conversion
- around door frames that get a lot of use
They’re usually paintable but not sandable in the same way as hard fillers. You smooth them neatly with a damp finger or tool while they’re still wet. They’re not the right choice if you want to sand back to a perfectly flat, glass-smooth finish in the middle of a wall.
Lightweight ready-mixed fillers are good if:
- you’re filling small dents, picture hook holes and tiny cracks in a rented flat
- you don’t want to mix powder or deal with heavy sanding dust
- you’re working overhead on a ceiling and don’t want the filler dropping out
They’re very easy to sand and won’t slump, but they’re not ideal for deeper repairs or areas that might get knocked.
Powder fillers you mix yourself suit:
- slightly deeper or wider cracks that need packing out
- older plaster walls in a hallway or stairwell
- areas where you’ll be sanding and repainting a larger section
They take a bit more effort, and you need to mix to the right consistency, but once set they’re firm and can be feathered out smoothly.
Whichever you choose, check the label for “interior”, “exterior” and “paintable” so you don’t accidentally use an outdoor masonry filler on a living room wall or a non-paintable product under emulsion.
Simple checks before you fill – and when to stop
Before you reach for the tub, a couple of quick checks will save you from refilling the same crack every few months.
First, run your hand over the wall. If it feels cold and slightly damp compared with the rest of the room, or you can see brownish staining or flaking paint, you may have a damp issue rather than a simple shrinkage crack. In a bedroom with condensation on the windows most mornings, the crack could be a symptom of moisture and temperature changes. Filling alone won’t cure that, and it’s better to improve ventilation and deal with any damp before cosmetic work.
Second, press lightly along the crack. If the plaster crumbles or sounds hollow, you might be dealing with loose plaster rather than a surface crack. In that case, a small filler repair may just fall out. It may be worth carefully scraping back to something solid and, if the area is larger than a handprint, considering a plasterer.
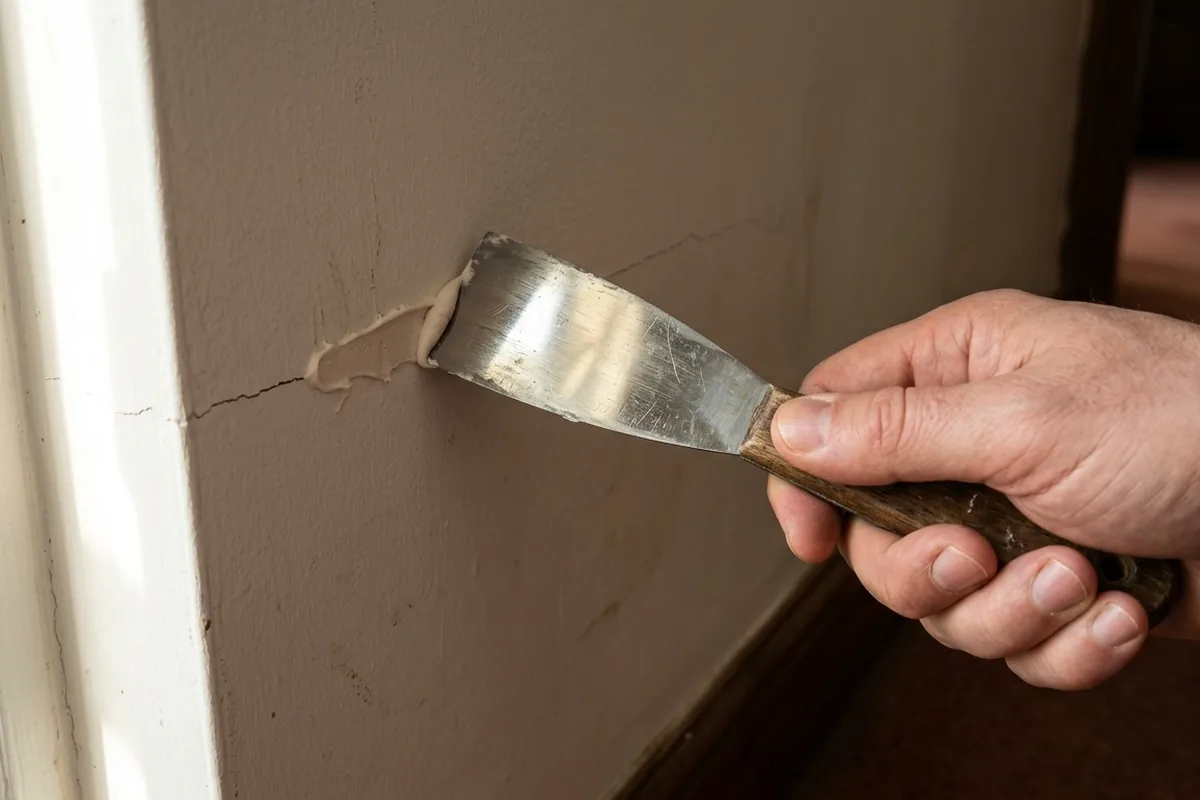
When you do fill:
- Widen hairline cracks slightly with the edge of a filling knife or a blunt scraper so the filler has something to grip.
- Dust out the crack with a dry brush; loose dust stops filler bonding.
- Apply in thin layers rather than one big blob if the crack is a bit deeper.
Allow proper drying time, then sand lightly with fine paper and wipe with a microfibre cloth before painting. Rushing the paint on to a still-damp filler is a common reason you see a faint line reappear under the new colour.
If you notice new cracks forming regularly, or existing ones suddenly getting wider or running diagonally from window corners, that’s the point to pause the DIY, take photos and speak to a professional rather than just keeping on with filler.
A small wall crack that stays small, feels dry and sits on otherwise sound plaster is almost always just cosmetic. Once you’ve matched the filler to the size and position of the crack, the real test is simple: after repainting, you should barely be able to find where you fixed it.