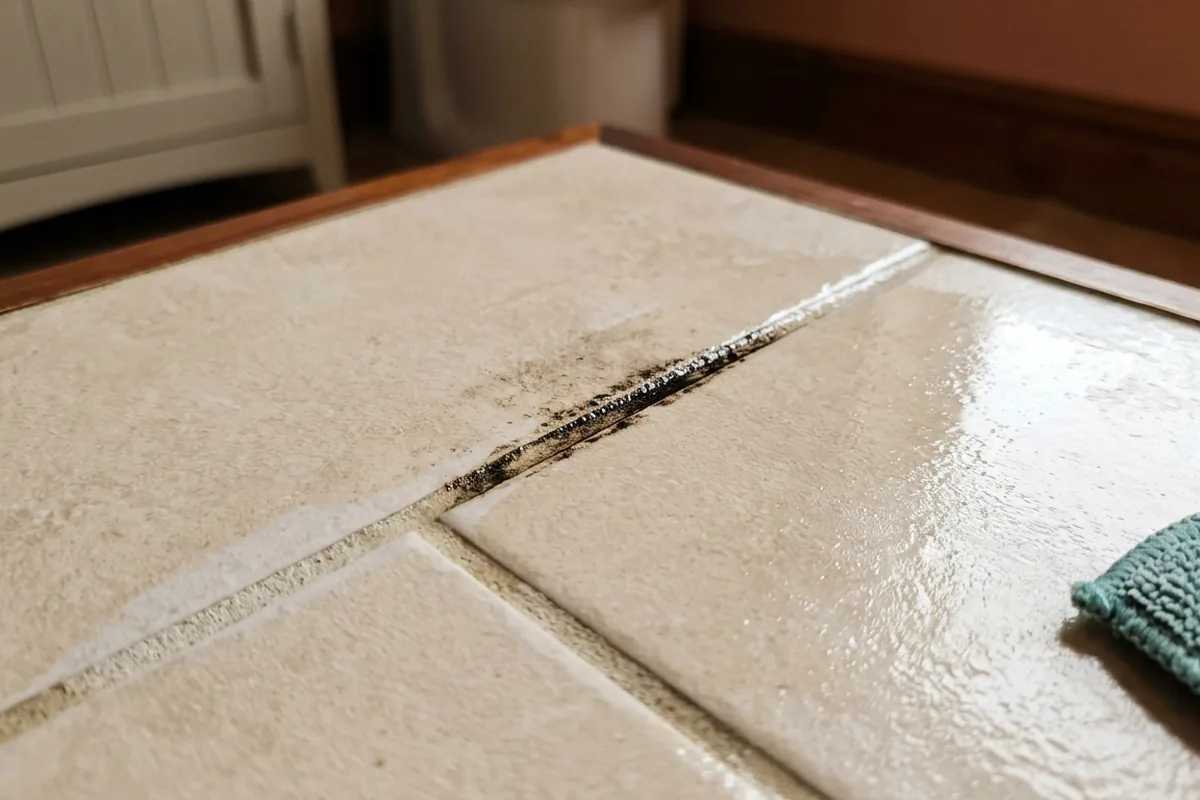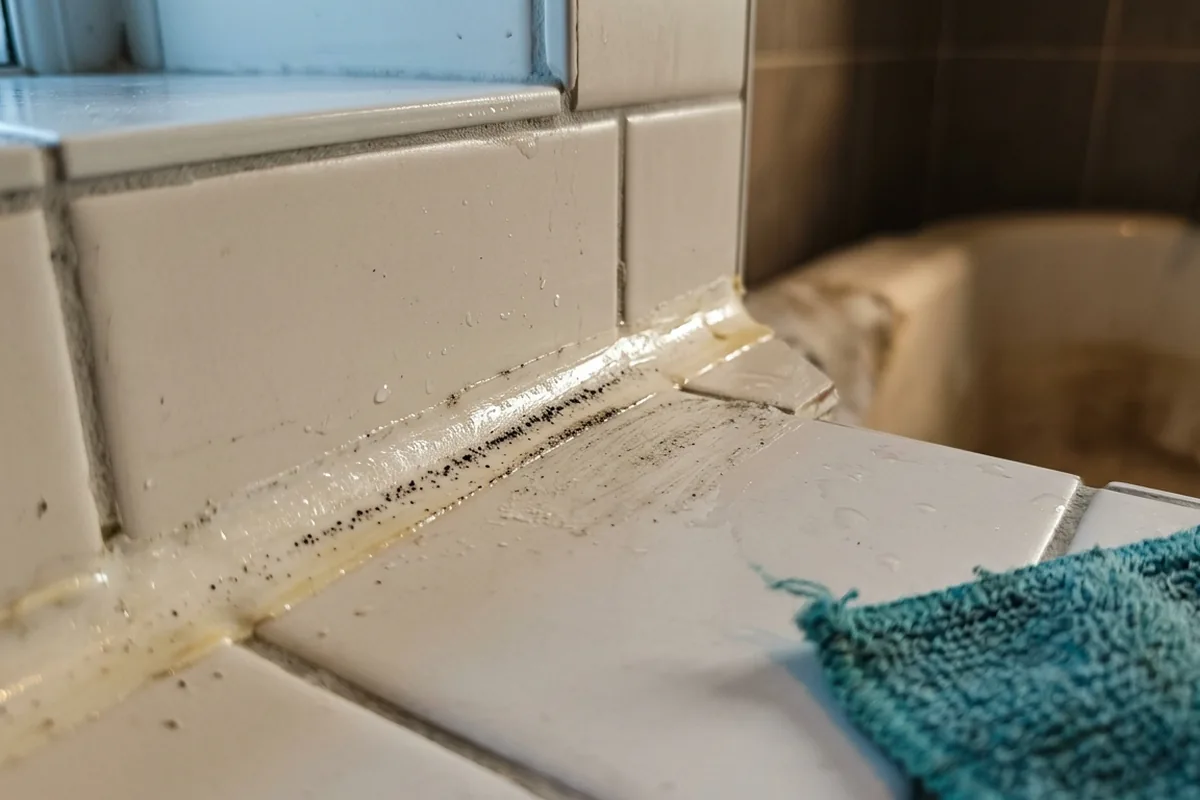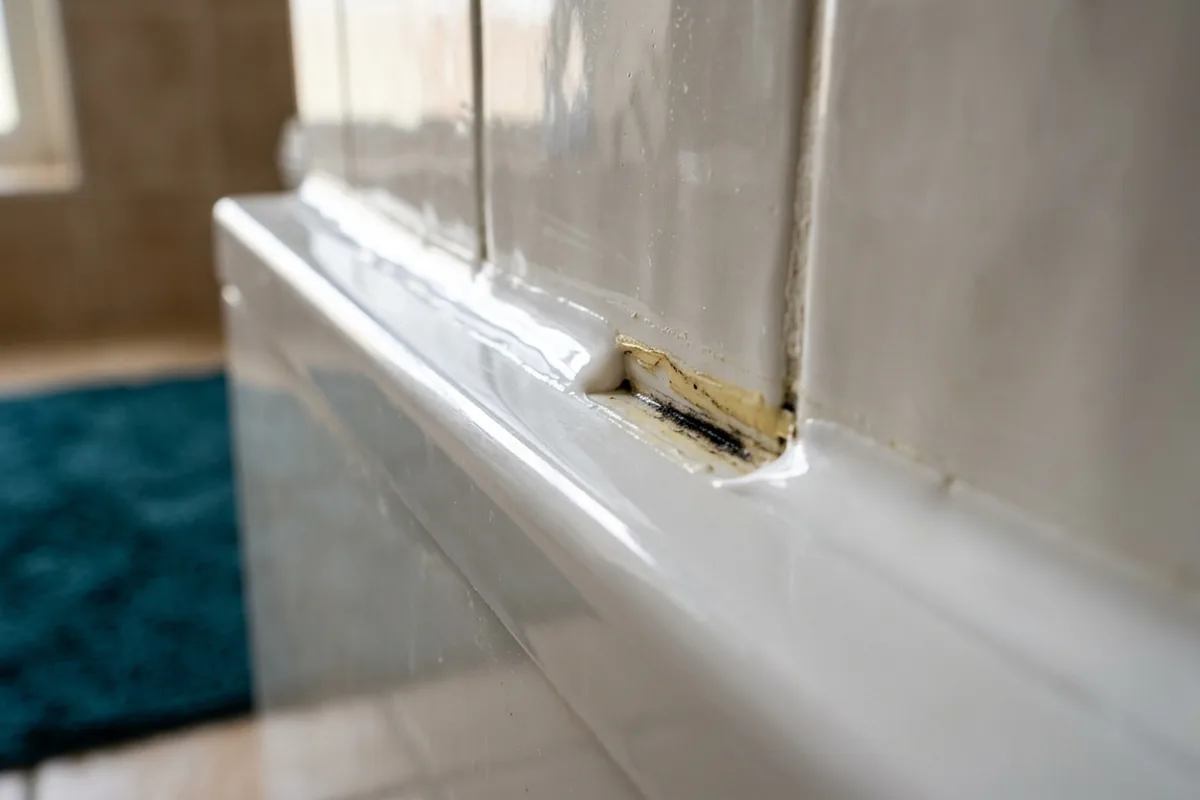
That dark line of mould along your bath or shower edge that keeps coming back, no matter how much you scrub, is often caused by one simple mistake: putting new silicone straight over old, mouldy or damp sealant. The fresh bead might look neat for a few weeks, but the mould trapped underneath is still alive and will bleed back through or lift the seal.
The fix is not another layer. The only way to stop that black edging for longer than a month or two is to remove the old silicone completely, dry the area properly, treat the mould, then reseal once it is clean and dry. If you skip any of those stages, you are almost guaranteed to trap moisture and mould again.
The mistake that keeps mould growing under bathroom silicone
Most people make the same shortcut in a small UK bathroom: the seal around the bath or shower tray has gone black, there is a bit of a musty smell, and instead of stripping it out, they run a fresh bead of silicone on top.
On the surface it seems logical. In reality it causes three problems:
- Mould and spores are sealed in, with warmth and moisture from every shower feeding them.
- Moisture has no escape route, so any damp behind the seal stays there.
- The new silicone cannot grip properly, because it is stuck to flexible, failing old silicone instead of a solid tile or bath edge.
That is why you often see bubbling, lifting or re‑blackened sealant within weeks of a “quick refresh”.
If your bathroom smells slightly musty, or the silicone feels soft and slimy when you press it, the issue is not just the visible black bits. The gap behind the seal may be wet, and the mould has probably spread along the length of the joint.
How to strip, dry and reseal so mould does not get trapped
To avoid trapping mould again, you need to think in layers: take everything back, dry it, then rebuild.
1. Remove every trace of old silicone
Use a plastic scraper or a silicone remover tool rather than a knife if you can, especially around acrylic baths and shower trays that scratch easily. Work slowly along the joint, peeling the silicone out in strips.
The critical bit is getting rid of the thin film that clings to the tiles and bath edge. That film is where new mould loves to sit. A proprietary silicone remover gel from somewhere like Screwfix or B&Q can help soften stubborn areas; follow the label and ventilate the bathroom.
Avoid gouging grout or scoring the bath edge. If you find sections where water has clearly been getting behind (crumbling grout, staining, a slight gap), that is a sign you did need to strip it all.
2. Clean and treat the mould, then rinse
Once the bulk of the silicone is off, clean the joint with hot water and a little washing-up liquid to remove grease and residue. Then:
- Apply a mould and mildew remover or a diluted bleach solution carefully to the exposed joint.
- Leave for the contact time on the bottle.
- Rinse thoroughly with clean water and wipe dry with a microfibre cloth.
Do not mix bleach with any acidic cleaner such as vinegar. If you prefer not to use bleach, a specialist bathroom mould spray is usually easier and safer than home-made mixtures.
If you have natural stone tiles, check the cleaner label first; some products can mark or etch stone.
3. Let the area dry fully
This is the step most people rush. Sealing over damp surfaces is another way of trapping mould and moisture underneath.
- Open the bathroom window and run the extractor fan.
- Avoid using the shower in that area for at least 12–24 hours.
- Feel the joint with your fingers: tiles, grout and the bath edge should feel dry, not cool and clammy.
In a cold terraced house or a small internal bathroom, you may need a bit longer, or a fan heater in the room (kept safely away from water).
4. Apply fresh silicone properly
Use sanitary silicone sealant with mould-resistant properties, not general-purpose silicone. Mask the edges with tape if you want a neat line.
Work in manageable lengths, smoothing as you go with a wet finger or profiling tool. The bead should bridge between tile and bath or tray, with no gaps or pinholes.
Then, crucially, leave it alone for the curing time on the tube, often 24 hours, before running a bath or shower. Using it too soon can pull the seal away and let moisture back in behind.
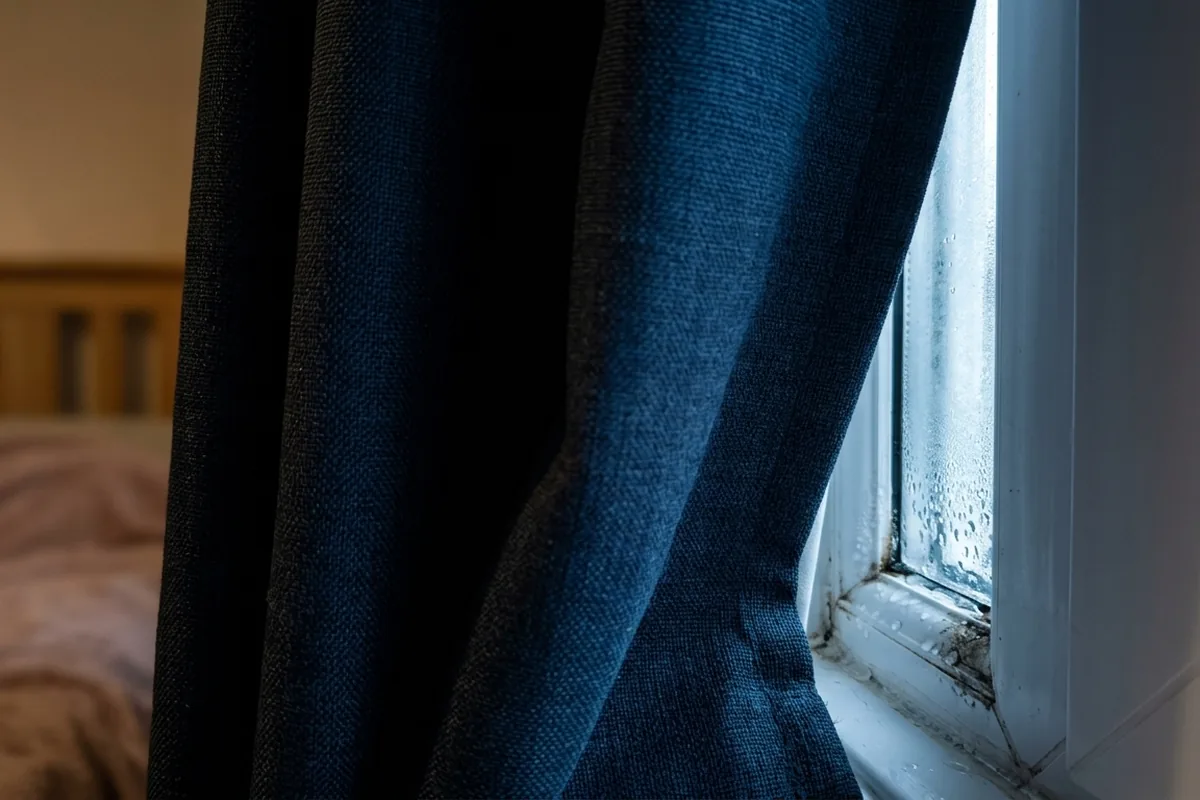
When mould on silicone points to a bigger damp problem
Most blackened silicone in a UK bathroom comes down to trapped moisture and poor cleaning access. However, there are times when repeatedly failing sealant is a symptom, not the cause.
If you notice any of these, look a bit wider than just the seal:
| Sign at home | What it may mean | First check |
|---|---|---|
| Damp or swollen skirting by the bath | Water escaping behind panel or tray | Check for leaks when the shower runs |
| Mouldy silicone plus loose tiles | Water has soaked into the wall | Press tiles gently to see if they move |
| Persistent musty smell in bathroom | Poor ventilation and constant humidity | Test extractor fan and window use |
| Mould on ceiling as well as sealant | Steam build-up, not just a bad joint | See if condensation sits after showers |
If tiles are loose, the wall feels soft, or skirting boards are swollen, resealing alone will not cure the issue. That is the point to pause and consider getting a plumber or bathroom fitter to check for hidden leaks or damaged backing boards rather than hiding it with more silicone.
For most small bathrooms, once the old silicone is stripped, the joint is cleaned and dried, and the fan is used properly after showers, the new seal should stay pale and clean for years, not weeks. If the black line creeps back quickly, the moisture source is still there somewhere, either behind the tiles or in the air.