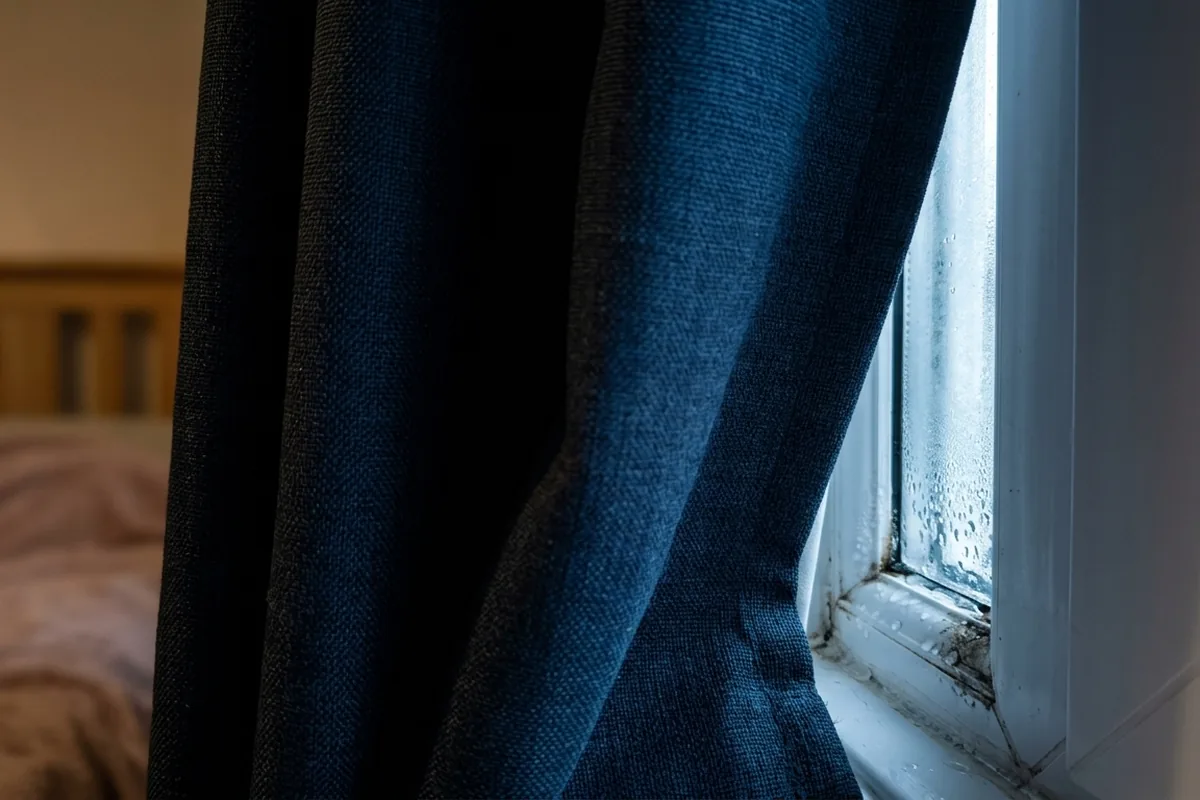
Condensation on your bedroom windows every cold morning can make you think the double glazing has “failed”. Before you start pricing up new units, check one simple thing: is the inner window seal actually doing its job, or is water getting past it and sitting where it should not? In many UK homes, the first problem is not the glass unit itself but a small break, gap or blocked channel around the frame that lets water linger and feel like a leak.
If the glass is misty inside the double-glazed unit, that usually means a failed sealed unit. But if you have water on the window board, damp silicone or mouldy corners, you may just have a seal or drainage issue around the frame. That is the quick check to make before blaming “condensation” or assuming the whole window needs replacing.
The one seal and drainage check to do first
The key check is simple: is water staying where it lands, or is it being guided back outside by the frame and seals? You are looking at the inner seals and the drainage route, not just the fog on the glass.
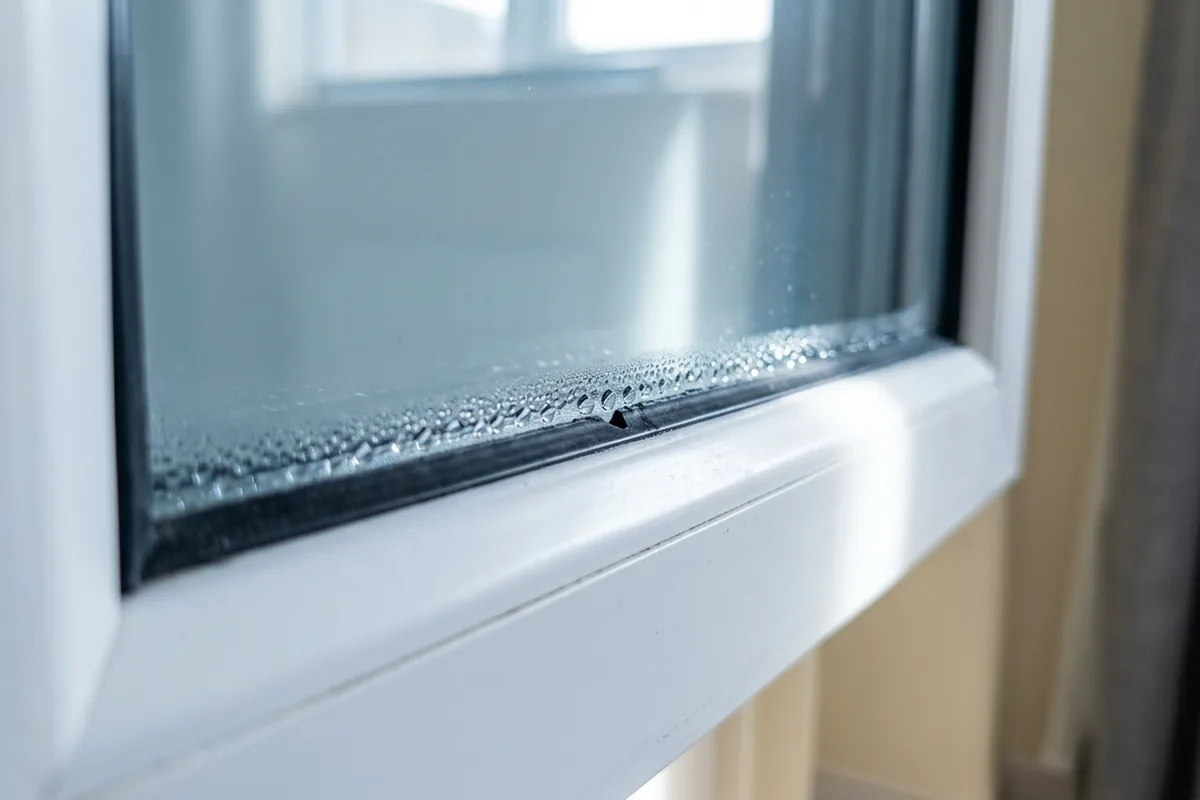
Stand at the window on a cool, damp day and look closely at three areas: the rubber or foam seal around the sash, the silicone around the frame, and the bottom of the frame where any drainage holes are.
You are trying to answer three questions:
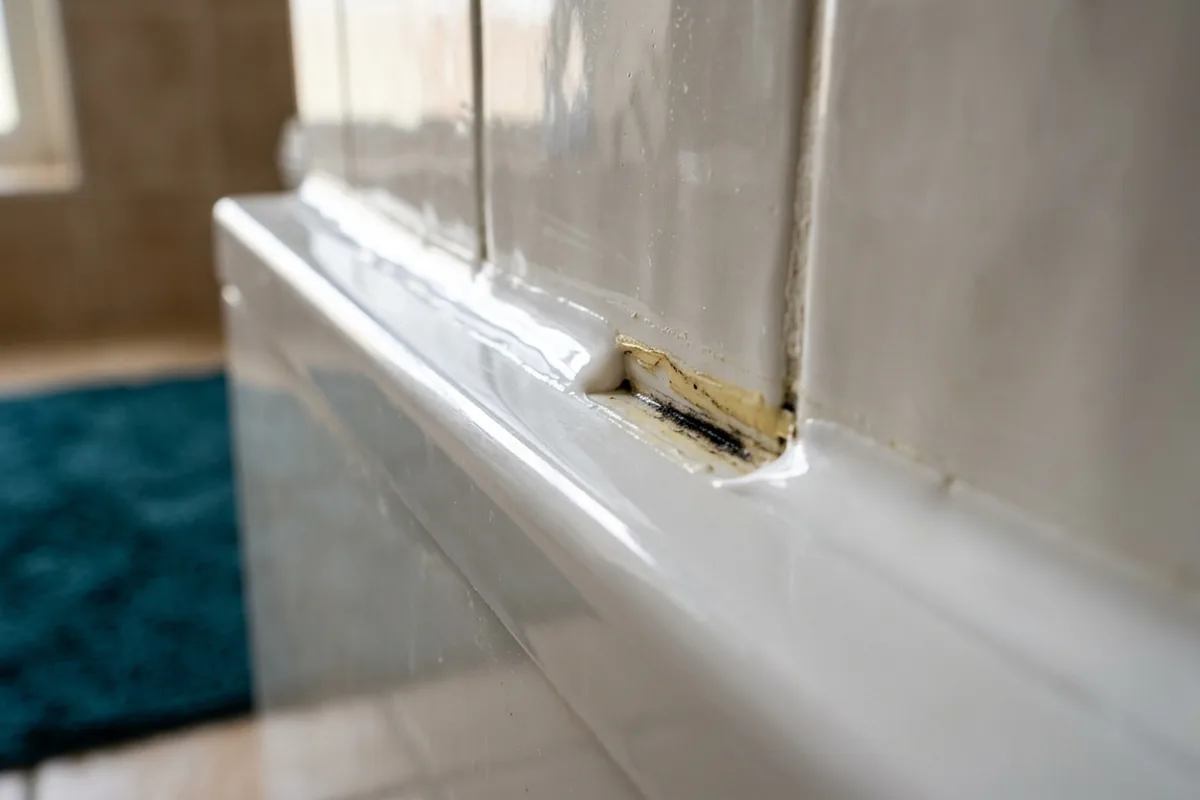
- Is the inner rubber seal continuous? Run a fingertip gently along the rubber (or brush a strip of kitchen roll along it). Look for obvious gaps, splits, sections that have come away from the groove or corners where the rubber has shrunk back. A 5–10 mm gap in a corner is enough to let water and moist air in.
- Is there a hidden puddle in the frame? Open the window and look at the bottom of the frame inside the rebate (the bit the sash closes onto). If it is regularly wet or has a dirty tide mark, water is getting in and not draining away.
- Are the drainage holes clear? On most uPVC windows you will see small slots or round holes on the outside bottom edge of the frame. Drip a small amount of water into the inner channel with the sash open and see whether it appears outside. If it does not, gently clear the holes with a cotton bud or soft plastic, not a screwdriver.
If the seal is sound and water drains freely, your wet glass and damp sill are almost certainly ordinary indoor condensation from showers, cooking or drying clothes, not a failed window.
How to tell condensation from a leaking or failed seal
Once you have checked the seals and drainage, match what you are seeing at home to the most likely cause. This is usually quicker than guessing or blaming the installer.
| Sign at home | What it may mean | First safe check |
|---|---|---|
| Water runs down glass overnight and dries by lunchtime | Normal room-side condensation | Increase ventilation and heating, wipe glass with a microfibre cloth or squeegee |
| Mist or fog trapped between the two panes all the time | Failed double-glazed unit | Check if the mist is between the panes even on dry days; speak to a window specialist |
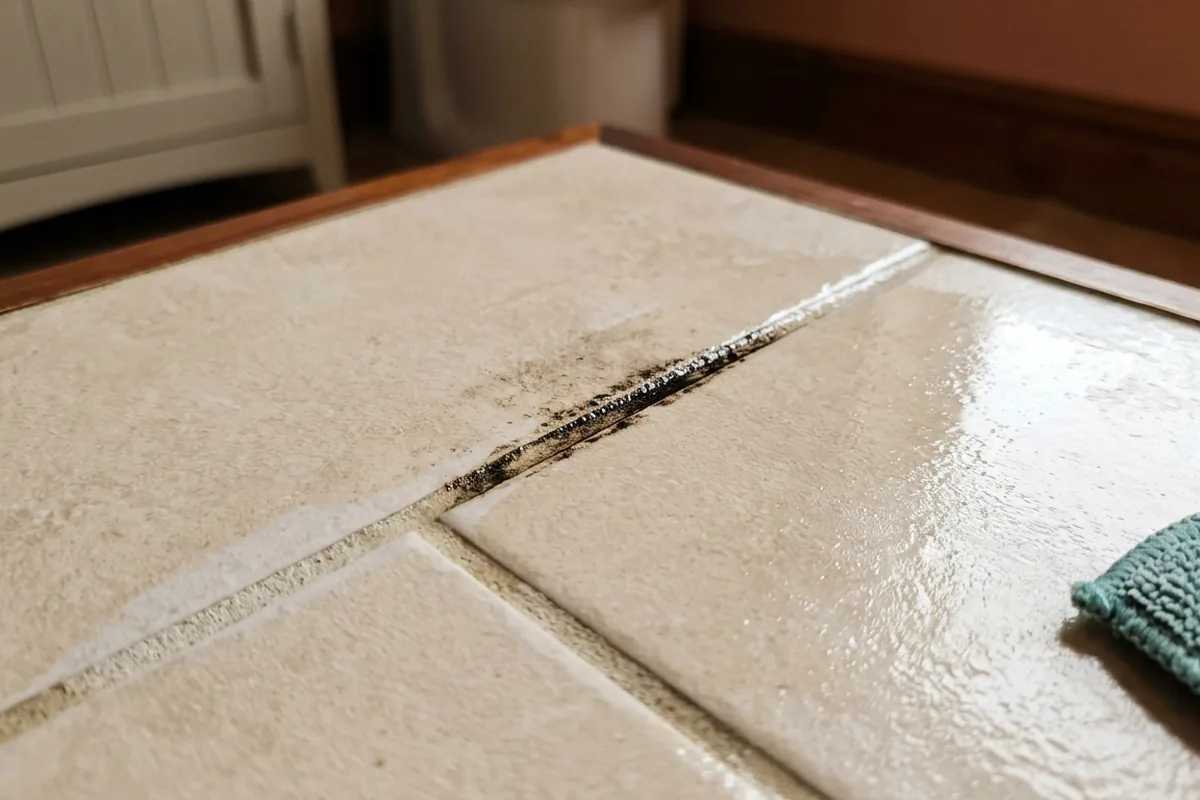
| Damp or mould on silicone at the bottom corners only | Water sitting in frame or minor seal gap | Inspect inner rubber seal and frame channel, clear drainage holes |
| Wet window board or damp skirting below after rain, even when room is dry | Possible frame leak or failed external sealant | Look outside at sealant around frame; avoid DIY if access is awkward |
A couple of extra pointers help:
- Condensation feels like a film you can wipe away easily with kitchen roll. It usually appears on the room side of the glass, especially in bedrooms after a cold night.
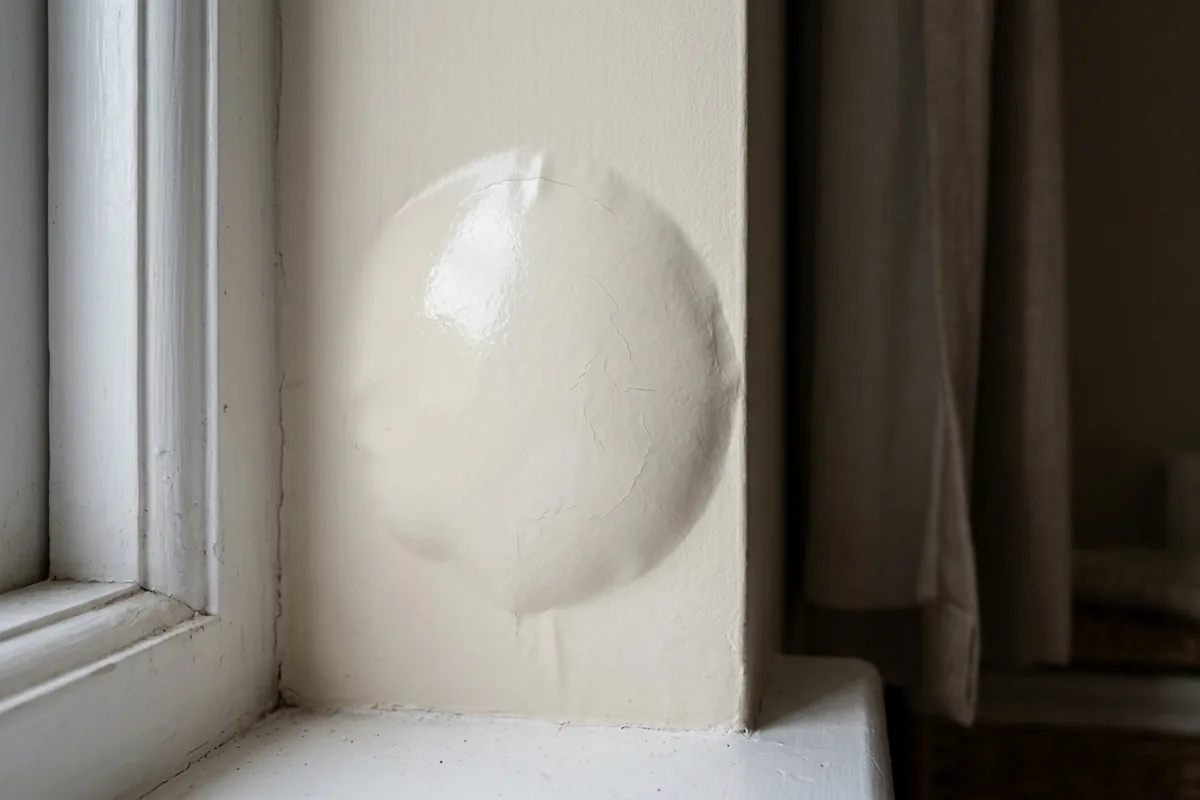
- Ingress from a bad seal often leaves staining: brown marks, swollen timber window boards or flaking paint on the reveal. That points to water coming from outside, not just moist indoor air.
If you are in a small rented flat with no trickle vents and a steamy bathroom, heavy condensation is common even with perfect seals.
What to do next if the seal or drainage looks suspect
If your quick check shows a problem, there are a few low-risk things you can do yourself and a clear point where it is better to stop.
If the drainage holes were blocked and you have cleared them, give the frame a wipe and watch it over the next few wet days. You should see less standing water in the inner channel and less dampness at the bottom corners. It may take a few days of drier weather before existing moisture in the frame and wall fully clears.
If the inner rubber seal has a small gap but is otherwise intact:
- You can sometimes push it gently back into its groove along the frame.
- If it has shrunk in a corner, you can often see a visible gap. Do not stretch it hard; that tends to pull it loose elsewhere.
- If a length has perished or torn, replacing that seal is a small job for a window specialist or competent DIYer, but it is not urgent emergency work unless water is pouring in.
Avoid the temptation to smear extra silicone everywhere inside. Internal silicone on the sash or frame edge often traps water where it should drain away and can make future repairs harder.
If you find damp plaster, swollen timber or repeated wet patches below the window even in dry weather, that is beyond a quick seal check. It may be failed external sealant, a poor window install or a separate damp issue in the wall. At that point, take photos in wet and dry conditions and speak to a local window firm or builder rather than attacking the frame with sealant yourself.
Once you have ruled out a seal or drainage fault, treat the rest as a condensation problem: more airflow, consistent gentle heating, lids on pans and using the bathroom extractor fan properly.
A simple look at the inner seal and drainage path can save you from blaming the glass, replacing good windows or endlessly scrubbing “mouldy” silicone that is actually just sitting in trapped water.