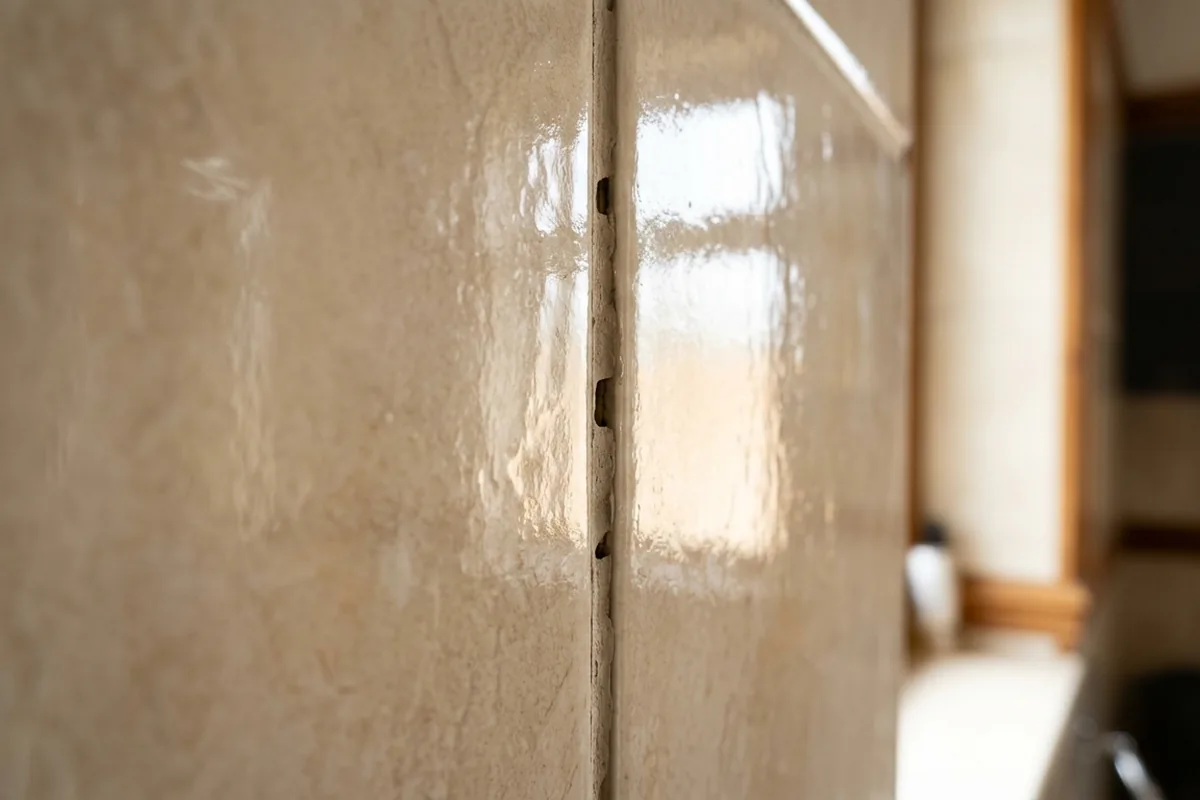
The tiles themselves can be straight, the grout colour can be perfect, and yet the wall still looks untidy. If your new kitchen splashback or bathroom wall has grout lines that look wobbly, fat in places and thin in others, the usual culprit is not the grout at all. The mistake is tiling without consistent spacers or with the wrong size spacers, so the gaps between tiles change as you go. Once grout goes in, every tiny variation is highlighted and the whole wall looks messy.
The quick fix is: check and control the gap between tiles before you ever open a bag of grout. Use proper plastic spacers of one size, keep them fully pushed in, and check your lines with a straightedge as you go. Grout can tidy edges a little, but it cannot hide badly spaced tiles.
The spacing mistake that ruins clean grout lines
Uneven or missing spacers are what usually make grout lines look messy, not the grout mix or colour. When tiles are set by eye, or spacers are used loosely, you end up with inconsistent joints: 2 mm here, 4 mm there. Once filled with grout, those joints look like they’re wandering up the wall.
The key mistakes are:
- Not using spacers at all, relying on the tile edge.
- Mixing spacer sizes when you run out halfway along a wall.
- Not pushing spacers fully home, so some tiles sit tighter together.
- Letting tiles slide on fresh adhesive, especially on a bathroom wall above a bath.
- Using spacers that are too big for small-format tiles, making every line dominate the wall.
Because grout shrinks slightly as it dries, any wider joints will also dry with more visible dips and shadows, exaggerating the uneven look.
If your grout lines already look messy, the honest answer is that there is no simple cleaning trick that will turn badly spaced tiles into crisp lines. You can improve the appearance a bit (more on that below), but the true cure is correct spacing at the tiling stage.
How to avoid messy grout lines on a new tiling job
If you’re about to tile a kitchen splashback, a small shower area or a loo in a terraced house or flat, getting the layout and spacing right from the start is what makes the grout look neat.
Before you start sticking tiles to the wall, check:
- The wall is reasonably flat and sound.
- You know your joint width (for most ceramic wall tiles, 2–3 mm is common).
- You have enough spacers of the same size for the whole area.
Then focus on three things.
1. Use the right spacers, consistently
- Choose one spacer size and stick to it.
- For small metro tiles above a kitchen worktop, 2 mm or sometimes 3 mm works well; anything much bigger can look busy.
- Place spacers at the corners of each tile, and make sure they are fully inserted, not hanging halfway out.
- On vertical runs, use extra spacers mid-edge if tiles are tall and tend to bow or slide.
2. Control tile movement while the adhesive is wet
Tiles on a bathroom wall can slowly creep down under their own weight, closing gaps and squeezing grout lines.
- Use a batten or straight timber screwed temporarily to the wall as a support for the first row above a bath or worktop.
- Check vertical lines with a spirit level every few rows.
- If a tile has slipped and closed the gap, slide it back into place straight away and reinsert spacers.
3. Don’t expect grout to correct bad spacing
Grout will:
- Fill small chips on tile edges.
- Soften the contrast between tile and adhesive.
- Slightly even out tiny variations.
Grout will not:
- Make crooked tile rows look straight.
- Hide big changes in joint width.
- Fix tiles that stick out or sit too deep.
If, while you’re tiling, you notice a joint suddenly widening or narrowing, stop and adjust the tiles immediately. It is far easier to slide a tile while the adhesive is fresh than to live with a wonky grout line for years.
If the grout lines already look messy
If the wall is already tiled and grouted, you’re probably looking for a way to make it less obvious without ripping everything off. You have a few realistic options, depending on how bad it is.
If the joints are sound but just look untidy
If the grout is fully set, not crumbling and there are no gaps or cracks, you may be able to make the lines less noticeable:
- Clean the grout thoroughly with a mild tile/grout cleaner, warm water and a stiff brush. Grease and soap scum in a small bathroom or over a cooker can exaggerate shadows and make lines look patchy.
- Consider a grout recolouring pen or grout paint in a shade closer to the tile colour. A softer contrast can make slightly uneven lines less obvious.
- Avoid harsh scrubbing with metal tools that might chip tile edges and make the lines look even rougher.
If some grout lines are too wide or rough
Where a few joints are noticeably wider or lumpy:
- You can sometimes rake out just those joints with a grout rake and re-grout carefully, keeping your float tight to the tiles to define a cleaner line.
- Work gently to avoid damaging tiles or surrounding grout.
- Wear eye protection and a dust mask, and keep the area ventilated if you use any chemical remover.
This can tidy up the worst offenders, but it will not change the overall layout. If the whole wall is badly spaced, patching a few joints will only help a little.
When the only real fix is re-tiling
If:
- Joints wander all over the place,
- Tiles are obviously out of line with the worktop or window board, and
- The look is bothering you every time you walk into the room,
then the only way to get truly straight, consistent grout lines is to remove and re-tile the area with correct spacers and layout. For a small splashback or a short shower wall, this is sometimes worth doing properly once, rather than staring at messy lines for the next decade.
If you’re unsure about tackling re-tiling yourself, a local tiler can usually sort a modest area fairly quickly, especially if you’ve already stripped the old tiles and made good the wall.
The simple test as you stand back and look at your wall is this: if the tiles are in straight, level rows with consistent gaps, your grout lines will look neat. If the gaps wander, no cleaner or magic grout product will fully hide that. On your next tiling job, spend more time on spacers and alignment than on choosing grout colour, and the lines will largely take care of themselves.