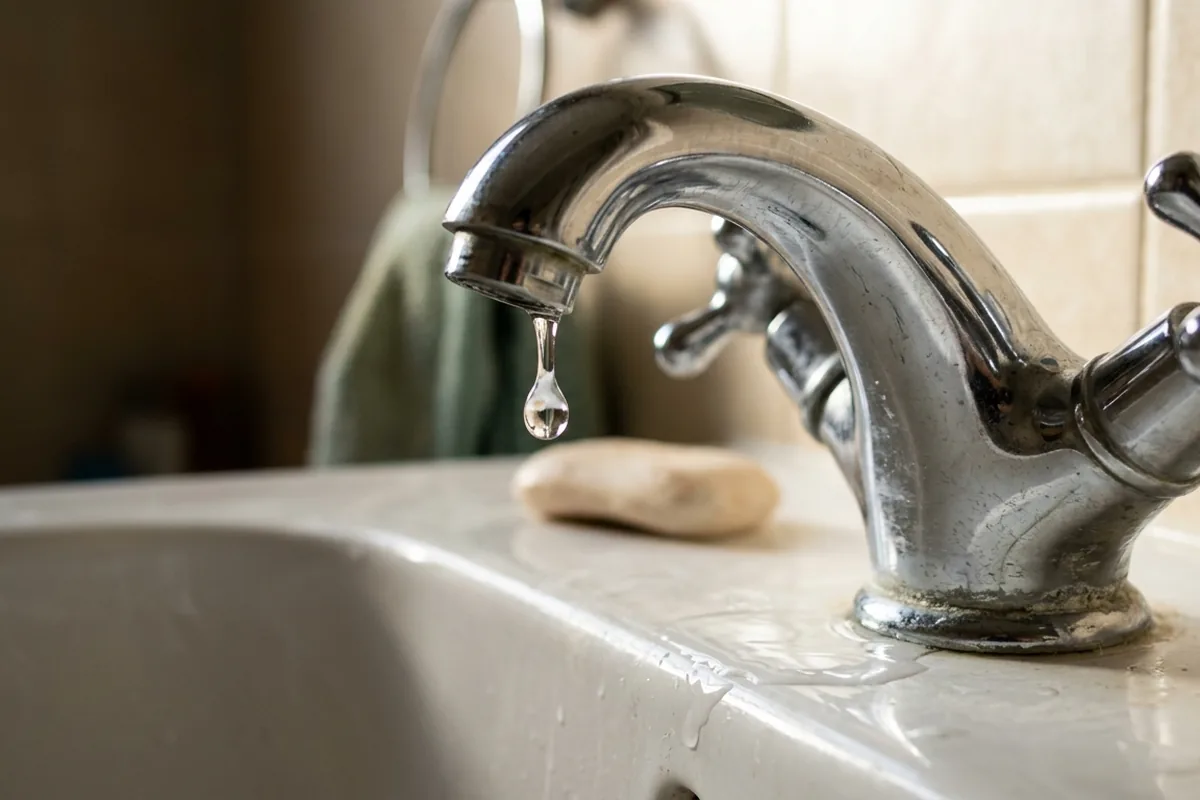
That slow drip in the kitchen or bathroom sink looks minor, especially when you can still turn the tap off “most of the way”. It is tempting to shut the door on the sound and deal with it another time. But a leaking tap is more than a small annoyance: it quietly wastes water, can stain and damage your sink and worktop, and often signals a worn part that will only get worse. Fixing it early is usually a simple washer or cartridge swap; leaving it can mean stiff taps, bigger leaks and swelling units.
Why a slow-dripping tap matters more than it looks
A slow drip usually means a worn washer, cartridge or seal that is no longer holding back the mains pressure properly. The tap is effectively “failing in slow motion”. It may stay like that for months, but it very rarely gets better on its own.
Even at a drip every few seconds, you can quietly waste a surprising amount of water over a year. You also pay for any hot water that is being heated, then tipped straight down the drain. In a metered home, that is money you never see.
There is also the surface damage. Constant drips can leave brown or green marks where limescale and minerals dry on the sink or bath. On a stainless steel sink this can pit the surface. On a bathroom basin, the drip line can etch into the glaze over time, especially in hard-water areas.
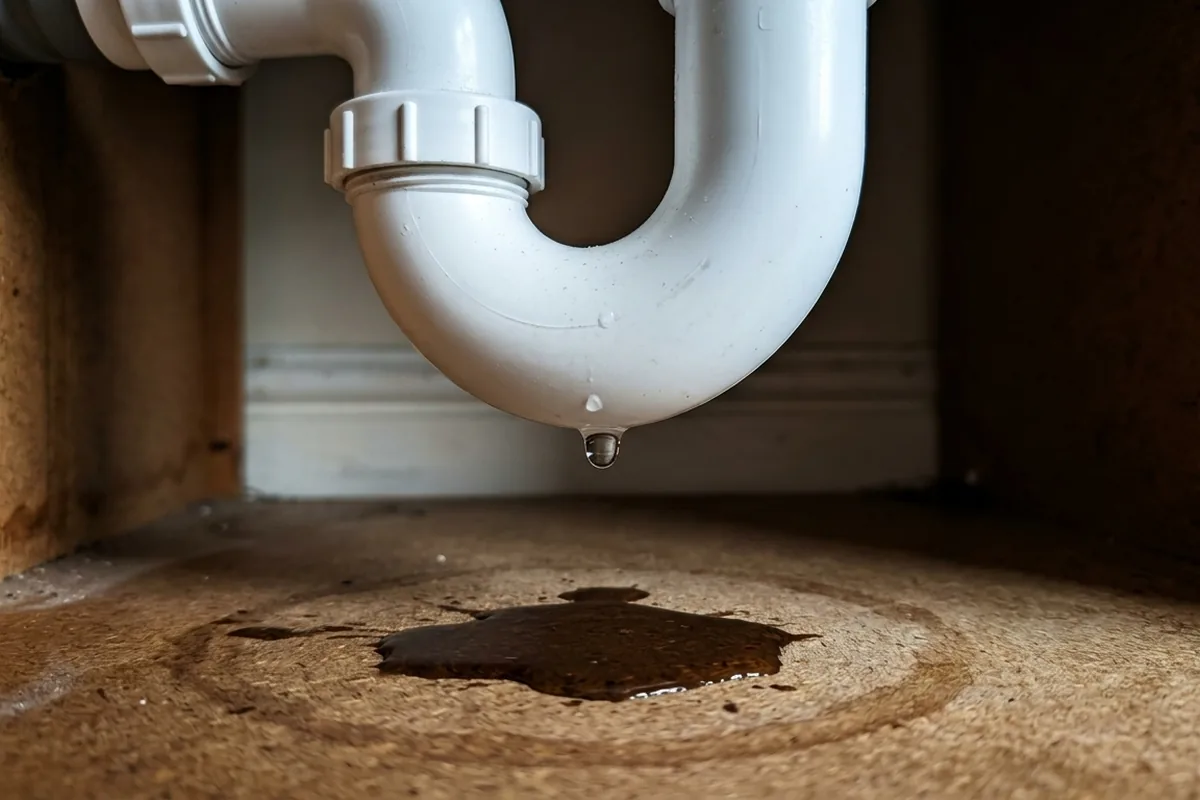
Around the tap itself, water can creep under the base and into the worktop or vanity unit. In a typical UK kitchen with a chipboard worktop, the first sign is often swollen or blown edges around the tap hole or the back of the sink, or a musty smell in the under-sink cupboard. Once chipboard has puffed up, it never really goes back.
Finally, a leaking tap is a warning that the internal parts are worn. If ignored, that can turn into:
- A tap that becomes very stiff to turn.
- A handle that suddenly spins with no effect.
- A leak that goes from drip to trickle, or starts leaking under the sink when the tap is on.
All of these are more awkward to deal with than a simple early repair.
What a leaking tap is telling you – and first checks to make
When you spot a drip, it helps to work out where the water is actually coming from before you do anything else. That gives you a rough idea of the problem and whether it is safe to watch and wait for a short time or better to act quickly.
| Sign at home | What it may mean | First safe check |
|---|---|---|
| Drip from spout when tap is off | Worn washer or cartridge | See if it stops when you turn tap off firmly but gently |
| Water seeping around tap base | Failed O-ring or seal, or splashes not draining | Dry area, run tap, watch for fresh seepage |
| Drip or damp in under-sink cupboard | Loose connection or failed flexible hose | Wipe dry, then run tap and feel for fresh moisture on pipes |
| Drip only when hot used | Issue with hot-side washer/cartridge | Test hot and cold separately |
If the drip is only from the spout and everything under the sink is dry, you are usually dealing with a worn internal part in the tap itself. This is often a straightforward job for someone comfortable turning off the water and using basic tools.
If you find damp pipe joints, green staining, or actual drips in the cupboard, treat it as more urgent. Place a bowl or tray underneath to catch water and avoid storing anything absorbent like cardboard or spare tea towels there. If you are not confident tightening or refitting plumbing connections, this is a sensible point to call a plumber rather than waiting for the joint to fail fully.
If the tap is on a bathroom basin or bath with silicone sealant around it, keep an eye on the seal. Persistent splashing or leaking can creep under failed sealant and lead to damp plasterboard, loose tiles or mouldy silicone around the taps.
How long you can safely wait – and when to fix or get help
For a simple drip from the spout with no other signs of trouble, you usually have a bit of time to plan the repair, but it is still better not to leave it for months. The more the internal parts wear, the less likely a quick washer swap will solve it.
Before you or anyone else works on the tap, do a couple of basic safety checks:
- Make sure you can turn off the water to that tap or to the whole property. Test the isolation valves (small quarter-turn valves on the pipes) or the main stopcock, and see that they actually stop the flow.
- Check you have the right replacement parts. Modern mixer taps usually use specific ceramic cartridges; older separate hot and cold taps often use standard washers. If you are unsure, a quick photo of the tap and brand, taken to somewhere like Screwfix or B&Q, can help match the part.
If you attempt a DIY repair:
- Work in daylight if you can, with a towel in the basin or sink to protect it and catch dropped screws.
- Turn the water off, then open the tap fully to relieve pressure before dismantling anything.
- Stop immediately if anything feels seized or you are having to use a lot of force. It is very easy to crack a fitting or strip a thread.
Call a qualified plumber instead of pushing on if:
- You cannot isolate the water safely.
- The drip has turned into a small but constant flow.
- There is any sign of water getting into electrics (for example, under-sink sockets or integrated appliances).
- The tap is part of a more complex set-up you do not fully understand.
A working tap should turn smoothly, shut off cleanly without having to force it and stay dry around the base and underneath. If you fix the leak and then notice new damp patches, mouldy silicone or a musty under-sink smell over the next week or two, the leak may have been going on longer than you thought and caused hidden damage, which is worth investigating sooner rather than later.
Sorting a slow drip while it is still just an irritation usually means a quick, tidy job and a tap that feels “like new” again, instead of a bigger, messier leak that chooses its own timing.